God will see me through April 16th

[This is an updated/edited post from my old blog. This is my personal experience and opinion.]

17 years ago today, I thought my life had literally ended. I watched my beloved daddy, his vitals dropping, slipping away from us, and then he was gone.

At each milestone of our lives (my family’s), I wished he was there to see us. For me personally, each time I stood on a stage performing, I wished so much that he was sitting in the front row, proud as ever, with his video-cam, recording so he could watch it over and over again at home (that’s really what he used to do!). When I got married, I wished both my parents walked me down the aisle. When Z was born, I imagined what daddy would have been like with him.

I’ve mentioned previously (in a post on my old blog) that grief sneaks up on you all the time, when you’re least aware, but with Christ in my life, I know I can cope. Even through blurring tears I can still stand up and say YES…GOD WILL SEE ME THROUGH!

Please understand that I didn’t post this so that I could gain sympathy from you, my dear reader, I do know you care for me :) I posted this because many still assume that Christians must be happy all the time, or worse, assume that God will always change our situations when we pray, and therefore treat God as our personal genie in a lamp, bowing to our every whim to keep us happy. It is true that God can change the situation, and grant our desires etc. however, ultimately, our faith is not about that, our faith is about trusting in God and relying on Him alone, knowing that His love for us is true. His plans are never to harm us.

For I know the plans I have for you,” declares the LORD, “plans to prosper you and not to harm you, plans to give you hope and a future.
- Jeremiah 29:11

17 years…17 years of “un-change” in my situation. The years come and go, the milestones are reached and passed, the anniversaries continue to come up, I cry another load of tears and think back to the times when daddy was around. Yet, even in the darkest hours of my soul, I know I will get through, because my future, my hope, is in Christ :D This hope alone is enough for me to keep going, keep smiling, but God makes sure I have the added comfort of His presence, daily, so that even my “keep going” is powered by His grace and might.

And I look forward to the day when I will see daddy again, and thank God always, for giving us the faith to know this day WILL come.

I hope that this little post will be a small source of encouragement to anyone out there experiencing any form of pain. Our situations may or may not change, but thank God He (His character & qualities) NEVER changes. He’ll see you through!

Every good and perfect gift is from above, coming down from the Father of the heavenly lights, who does not change like shifting shadows.
- James1:17

Posted in Just Me Thinkin' | 9 Comments

The Centre-Pull Ball – Photo Tutorial

I don’t have access to a yarn-winding service, and don’t have a yarn winder either, so I had to learn how to unwind a hank of yarn, and hand-wind it myself.
I’m also a fan of pulling my yarn from the inside of the skein/ball because it rolls around less than when you use the yarn from the outside. So I prefer centre-pull balls.
I remember the first time I tried to unwind a hank and wind it up to use knowing nothing about it at all, I didn’t think to ask my mom how to do it. I mean seriously, I could have at least googled it right?!? No, I didn’t, blame it on baby-brains (I was about 6months pregnant at the time). Well, an hour later, my mom finished winding a small 50g hank of yarn, going through all the knots I’d produced etc. Oh boy.

So, I hope this photo tutorial will help prevent disaster for someone else! There are many books and articles that probably teach better than I do, but if this helps even one person, great! :)

Although it takes time to hand-wind large hanks like the one I am about to show you, I personally find it satisfying, therapeutic and just a little cute ;) I do recommend that you read the whole lot of instructions and look at all the pictures before starting.

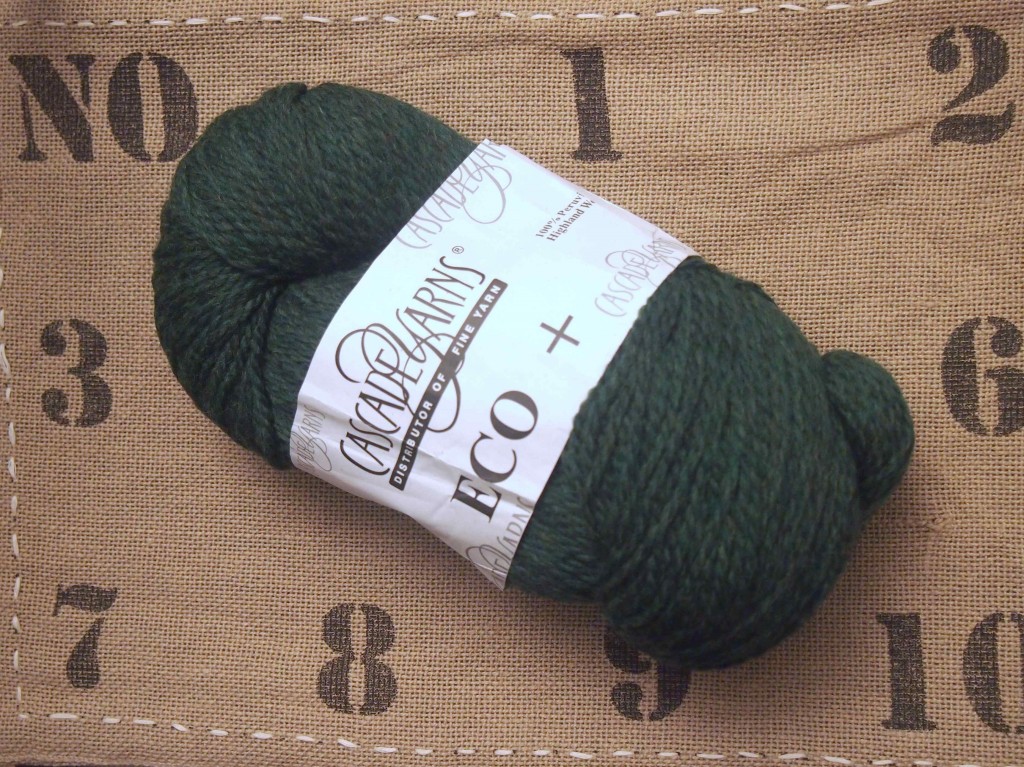
Cascade Eco+ Shade 2445 "Shire", ordered online from Jimmy Beans Wool

I’m knitting Kalura’s gorgeous “Through the Woods” hood. I’m calling it “Hobbit in the Woods” because I decided to knit it to match a jacket I’m making for little Z this Winter (Cotton & Cloud’s Cabled Yoke Jacket) and it just reminds me of the green capes the hobbits wore in the movie version of Lord of the Rings (I am a fan of both the book and the movie). The yarn I’m using is Cascade’s Eco+ in shade 2445, aptly named “Shire”.

Preparation: Set the stage!

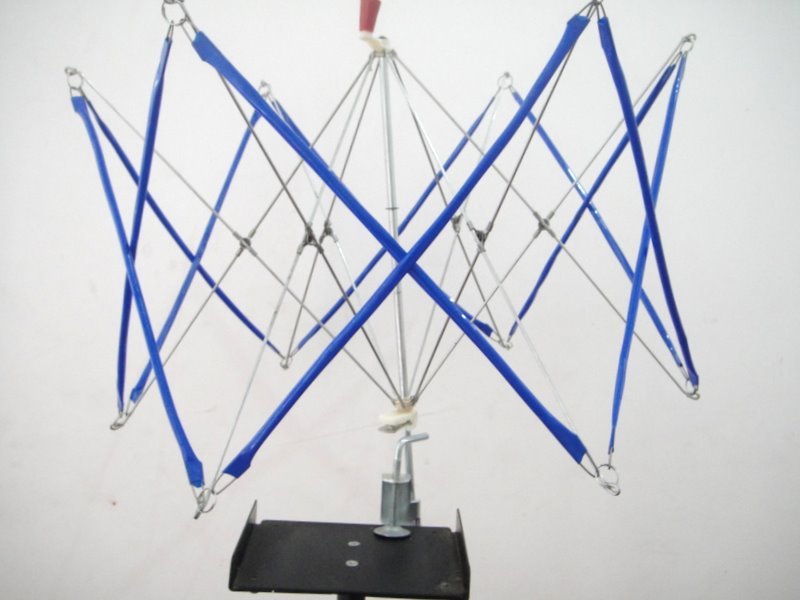
Firstly, decide how you are going to stretch the hank of yarn so that you can easily unwind and hand-wind it. Think of the classic picture of the grandchild keeping her hands still with the yarn around them while grandma hand-wound her yarn :) . Your spouse, bf/gf is another awesome yarn holder ;) “Except maybe use them sparingly and only for small hanks of yarn”, I hear my experienced Hubby yell. Your feet are possible, except that is pretty tiring (great exercise though I suppose!). You can buy yarn-winder-holders too (picture below). I opted for the other classic – the chair-back option. Placing two chairs (preferably heavy-ish chairs) back to back but spaced apart (depending on how big the hank of yarn is).

A yarn-winder-holder (or whatever its called!)

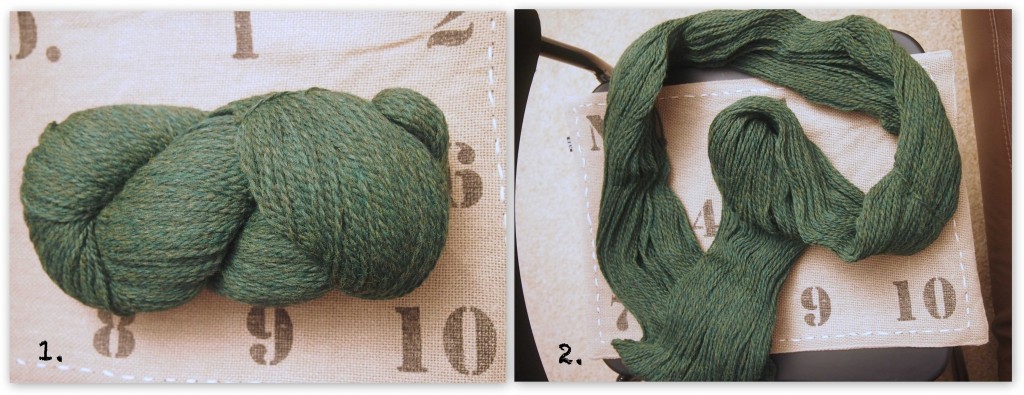
After you’ve taken off the label (Photo 1.), carefully untwist the hank so you can see the wound ring of yarn (Photo 2.) Sorry I forgot to take a close up of the knot, but you will find one somewhere in the hank. This is where the manufacturer has secured the hank. Undo it!

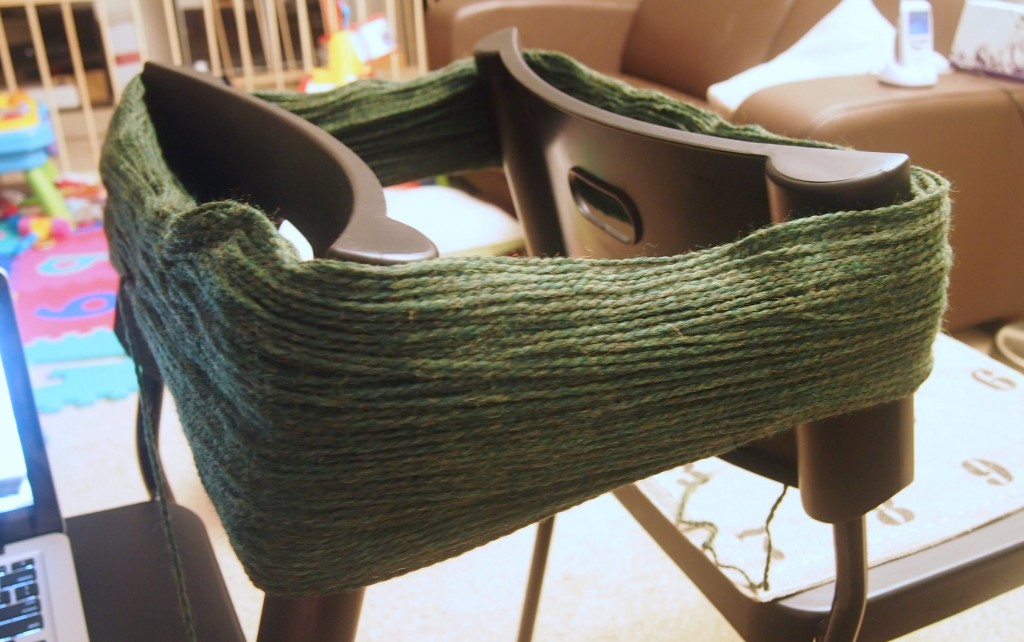
The important thing to remember here is that you should avoid agitating the hank of yarn too much, you want to keep the layers of yarn in the hank as it was when you untwisted it. This is so that when you unravel the yarn to wind it into a ball, you won’t feel that it is stuck anywhere, it will just unravel easily round and round and round. I hope this makes sense! So, after you’ve untwisted the hank, don’t move the hank too much, carefully undo the knot, and place the hank on your yarn holder. Anyway, here is my hank of yarn stretched around the chairs.

Hand-winding: The Core Issue

Given that this is specifically a centre-pull ball, it is the beginning, the “core” of the ball that you must wind correctly. Don’t worry, it’s actually quite easy.

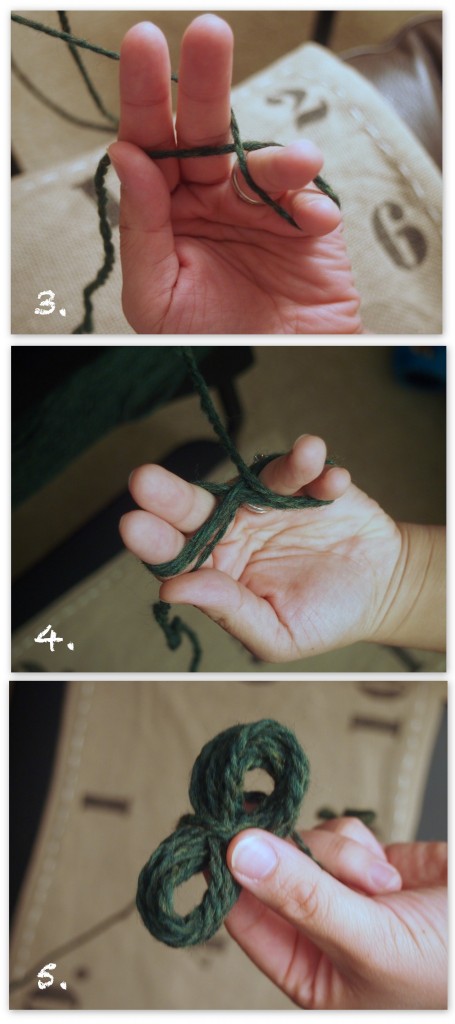
Choose one end of the yarn to start. I usually look for the end that appears to be on the outside of the hank (relatively). Leave a tail of about 10inches. Start winding the yarn in a figure-8 through and around your fingers (Picture 3). Let me try to break it down:

  • I put the yarn between my middle and ring fingers;
  • Wind down and around the pinky;
  • Back up and between middle and ring;
  • Then up and around the pointer.
  • Repeat all steps. I wound it like this about 10 times (Picture 4).

If your hank is quite small, you can probably just use two fingers, making a smaller figure-8.

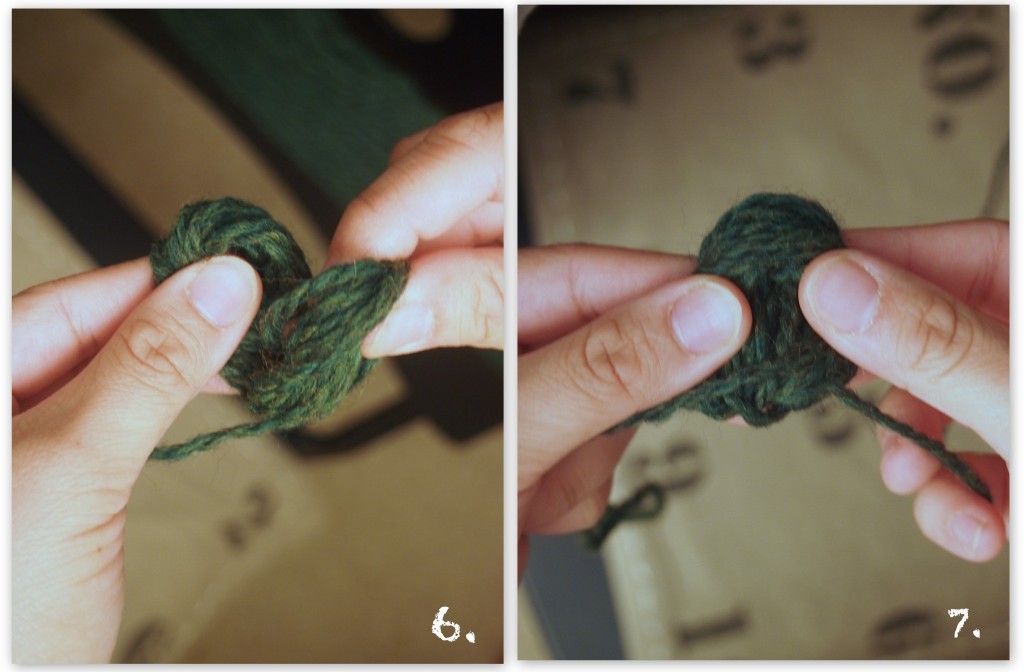
Now, gently take the “figure-8″ off your fingers (picture 5). Fold it in half (picture 6 and 7).


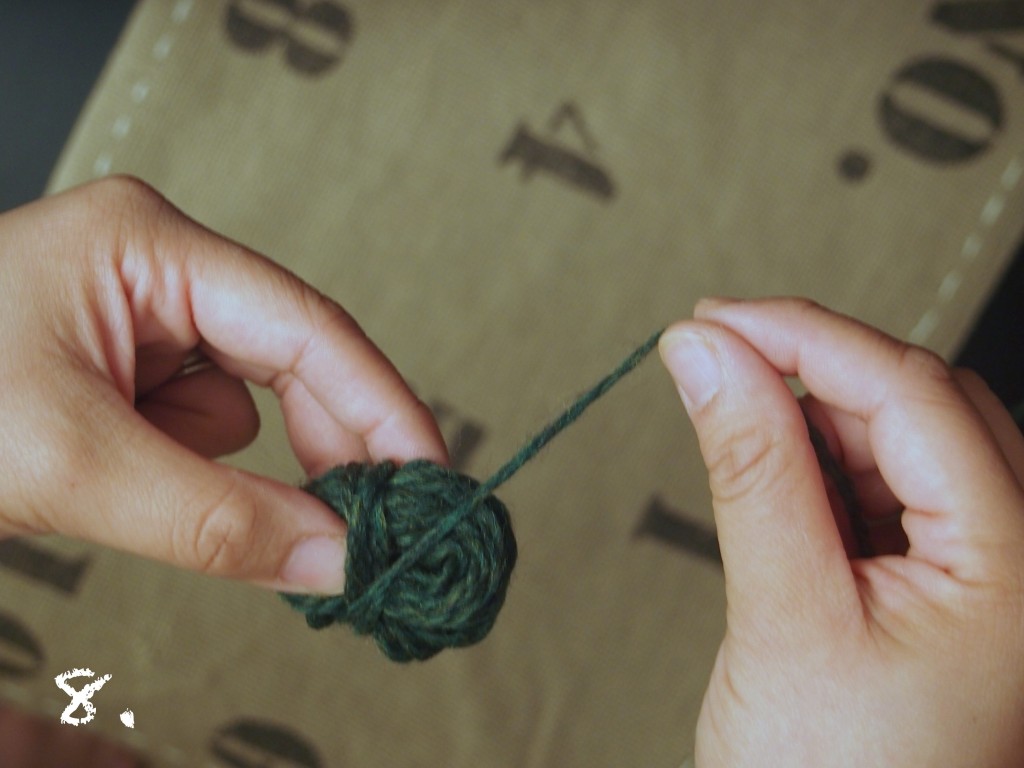
Now you can start winding quite happily, quickly and almost mindlessly (Picture 8), except here are two important points to remember as you continue to wind the ball:

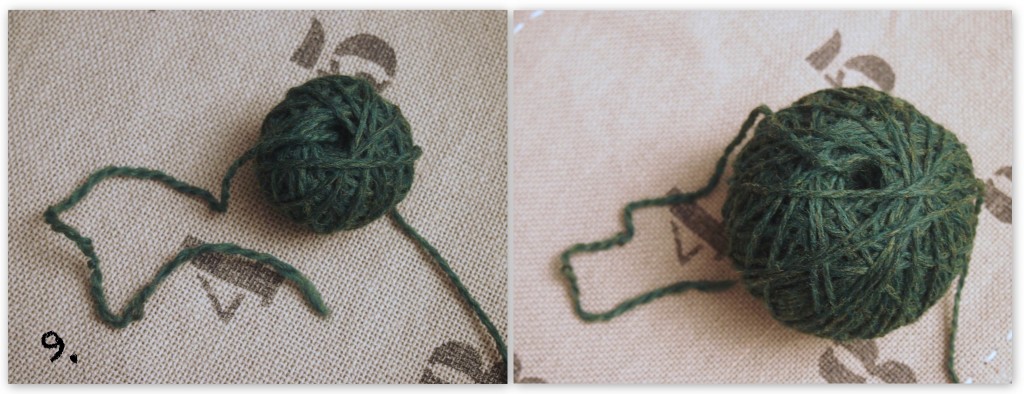
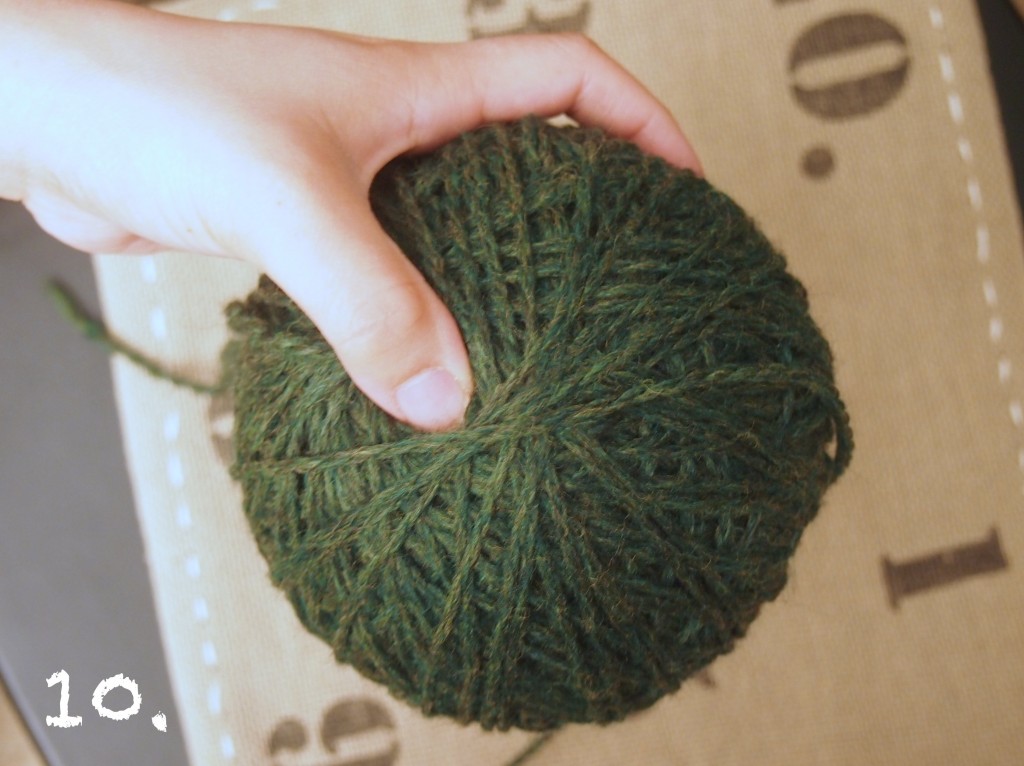
  • Always keep the starting tail free. By this, I mean that you should not wind too close to the tail (Picture 9). As I wind, I try to keep my thumb at the exit point of the tail (picture 10);
  • Wind loosely in the initial stages, so that the tail is not choked inside the ball

It's growing! (Keep the space around the exit point of the tail free)

Keep your thumb at the exit point to remind yourself not to wind it too close to the tail.

I’m definitely not a fast yarn-winder, but that’s alright, I was enjoying myself, watching an episode of “Castle” when I wound this. It took me about 40mins to wind this 478yd (437m) hank of yarn.

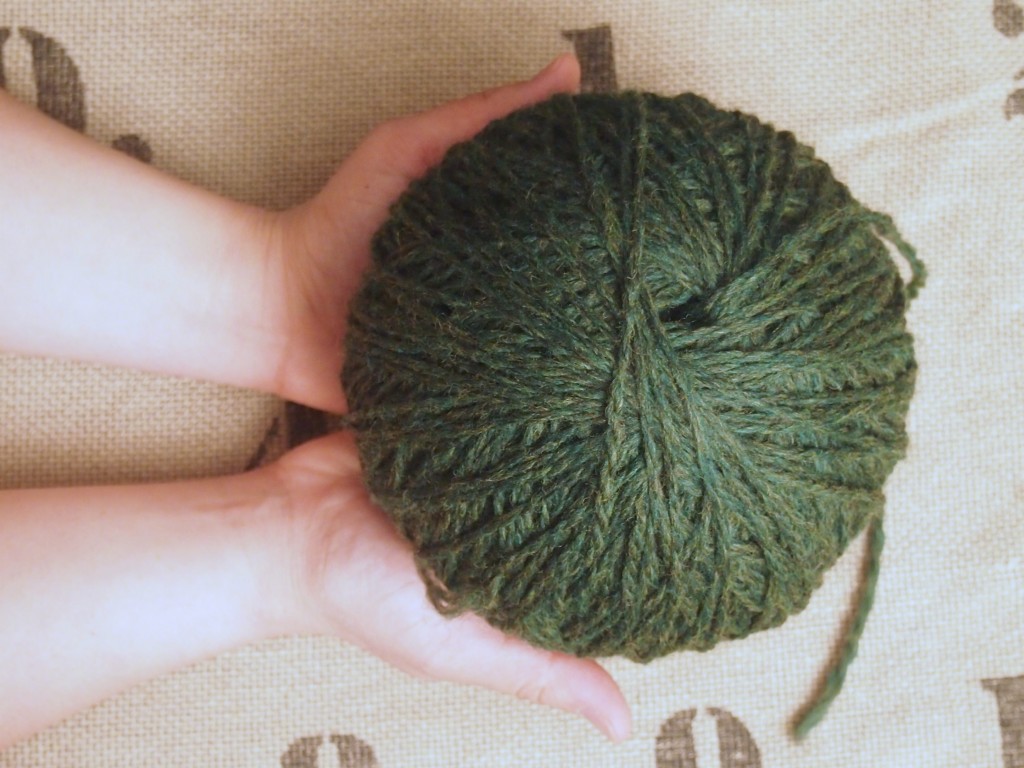
When you’ve finished, tuck the end (not the starting tail!) behind a strand on the outside of the ball, and tada!!!! One cute (even though it’s massive) hand-wound centre-pull ball!

A hand-wound ball is so cute...~happy sigh~ :)

Posted in Knitting, Tips & Tricks | Tagged , , , , , , , , , , | 2 Comments

Zooming Ziggy in the Sun

HAPPY NEW YEAR to everyone!! I pray that this year will see good health, joy and peace to all of us.

My NY blog-resolution is to start posting about my cooking adventures, about tatting, and about motherhood in order to fulfill what the tagline on my blog promises :p

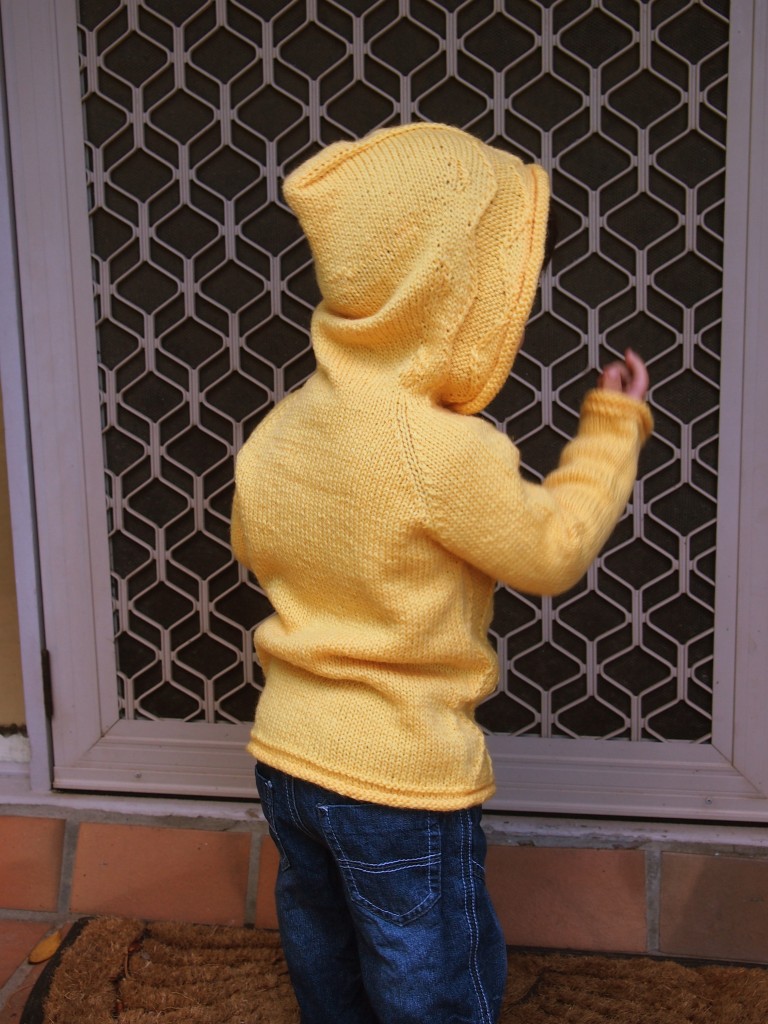
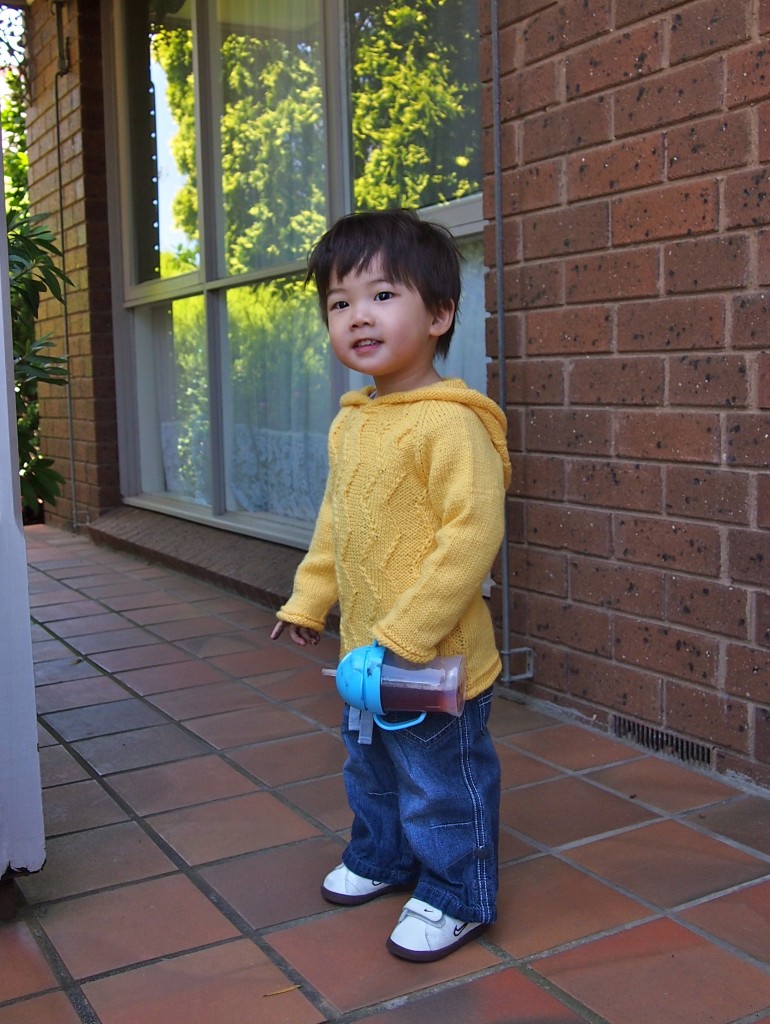
During my long break from knitting in 2011, one of my favorite designers, tiKKi brought a new boy-design out on Ravelry and she named it Ziggy. It is my favorite of all her designs so far! I knew immediately what color I wanted to knit this in for my little Z-man.

The trouble was that I needed a washable yarn that was non-acrylic, won’t droop, has good stitch definition, and is suitable for children’s delicate skin. Add to that the color I wanted, and I thought I’d never be able to knit Ziggy.

Along came my favorite yarn salesperson – Ruth from Woolsy Trading Post (Geelong), who pointed me to the Heirloom Easycare 8ply color 744. I didn’t want the really bright yellow like the “gold” in the Westcoast Eagles’ colors, but neither did I want the washed out yellow you see in “traditional” baby knitwear. 744 was perfect. It is machine-washable and 100% wool. Due to its crepe-twisted-structure, it IS a tad less smooth/soft to the touch, but it’s not scratchy.

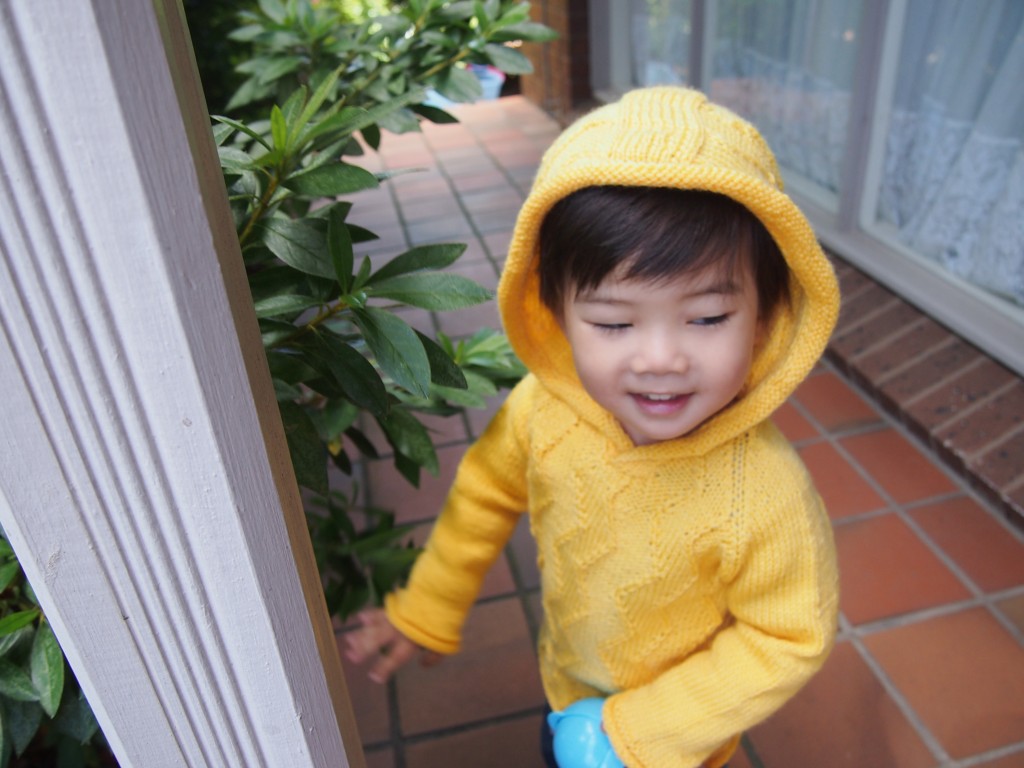
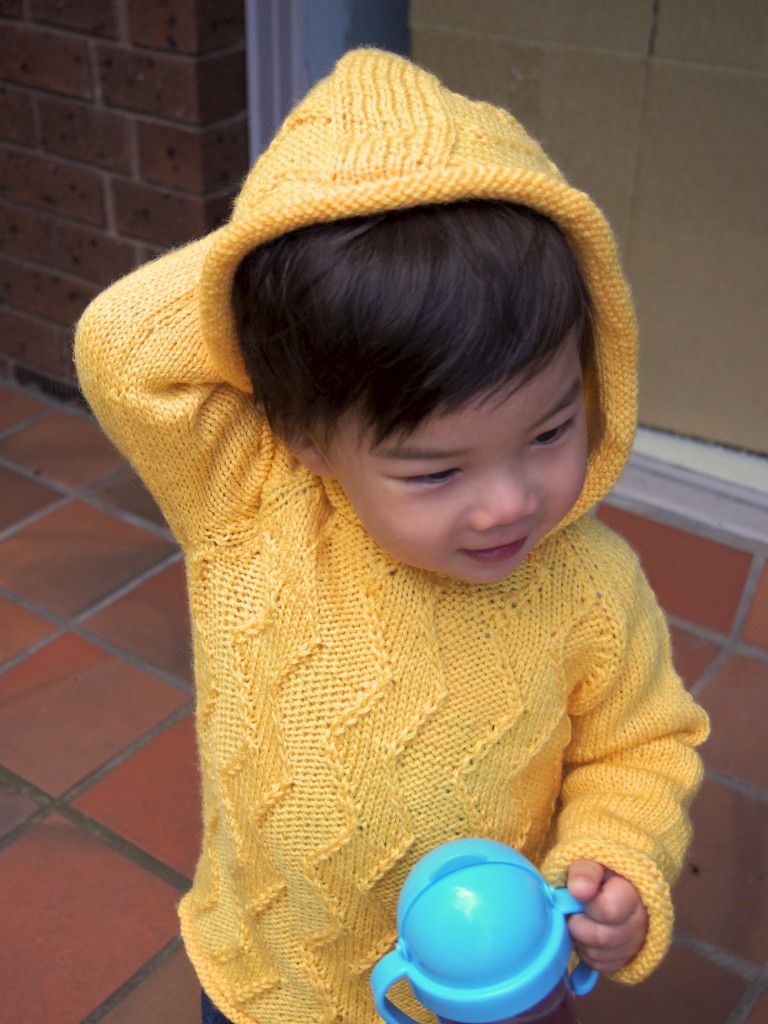
A bright, fun-looking hoody for my sunny, cheeky boy :)

Info for the Ziggy Z-man Hoody:
Yarn: Heirloom Easy Care 8ply (5.5 skeins of 744)
Needles: 3.5mm (didn’t hit gauge but didn’t want to go any smaller)
Size: 12months, knit for Z from 18-24mths (due to my loose gauge and Z’s skinny size).
Mods: none whatsoever because it’s perfect the way it is :)
Lesson learnt: I knit tighter in-the-round than straight…so the hood is way bigger than I expected :p

I was satisfied with my seaming of the underarms :)

Could've gone down to a 3.25 or even 3.00mm for the hood, but either way, I love how the Ziggy pattern continues up the hood :)

If you look closely, his right hand and his bottle are marked with black...the result of this zooming boy zig-zagging around in the garage, running his hand along my dirty car!!! SIGH (I don't usually let him walk/run in the front driveway/garage without holding my hand btw)

This hoody will last him at least all of 2012 :) I had in mind a hoody that suited my boy’s personality – his sunny smile, cheerful attitude, and adventurous and cheeky ways. So what do you think?

Posted in Uncategorized | 7 Comments

Knitting – Risky All ‘Round

Having a chronic pain in the wrist, the right wrist no less (I’m right-handed), is truly devastating. It affects everything about me. Picking up and carrying my son, crafting, cooking, music-playing…it was painful to do any of those things! The doctor told me it may or may not ever improve, just keep resting it. Uh huh…….. . So it has been about 6-7 months since I’ve dared to properly knit/crochet. I did do some tatting (I am really thankful for tatting!!) but haven’t had time to sew.

Due to this restriction, I have avoided Ravelry because it was too depressing and too tempting, but of course, I eventually logged on to just take a little peek at what my friends were making, and stumbled across the Kira Hooded Vest and I thought to myself, “thickish yarn, biggish needles…might not be too harsh on my wrist…”. Better than the lacy shawl I was attempting…duh.

I told myself to knit REALLY slowly, and I think I did, so the fact that it only took 4 days (I took 2 days’ rest in between) is a true testament as to how easy and quick this knits up.


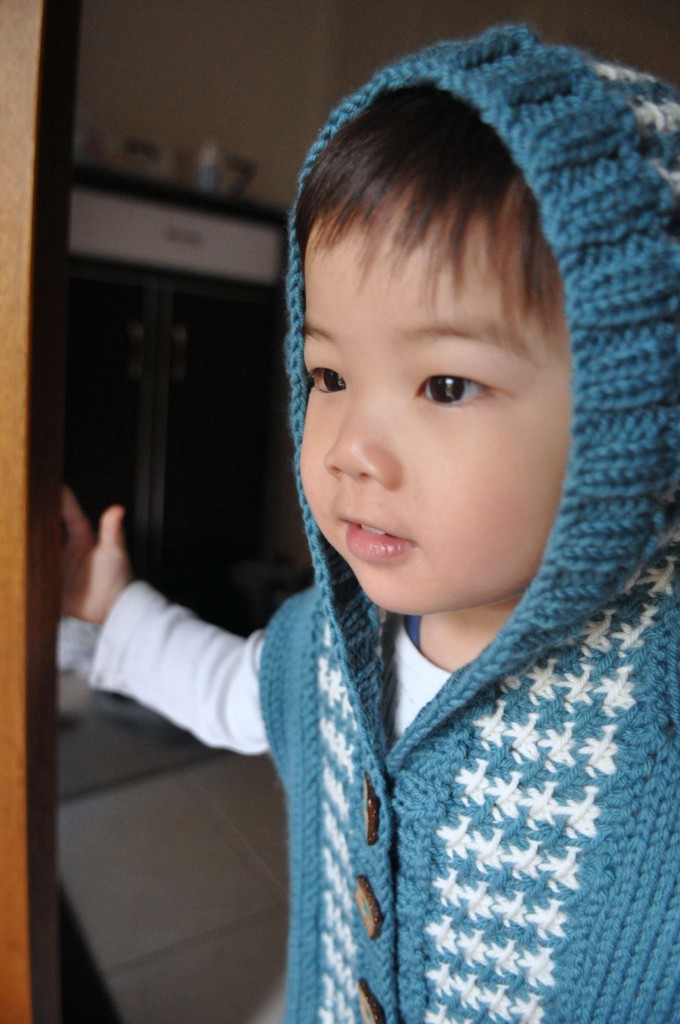
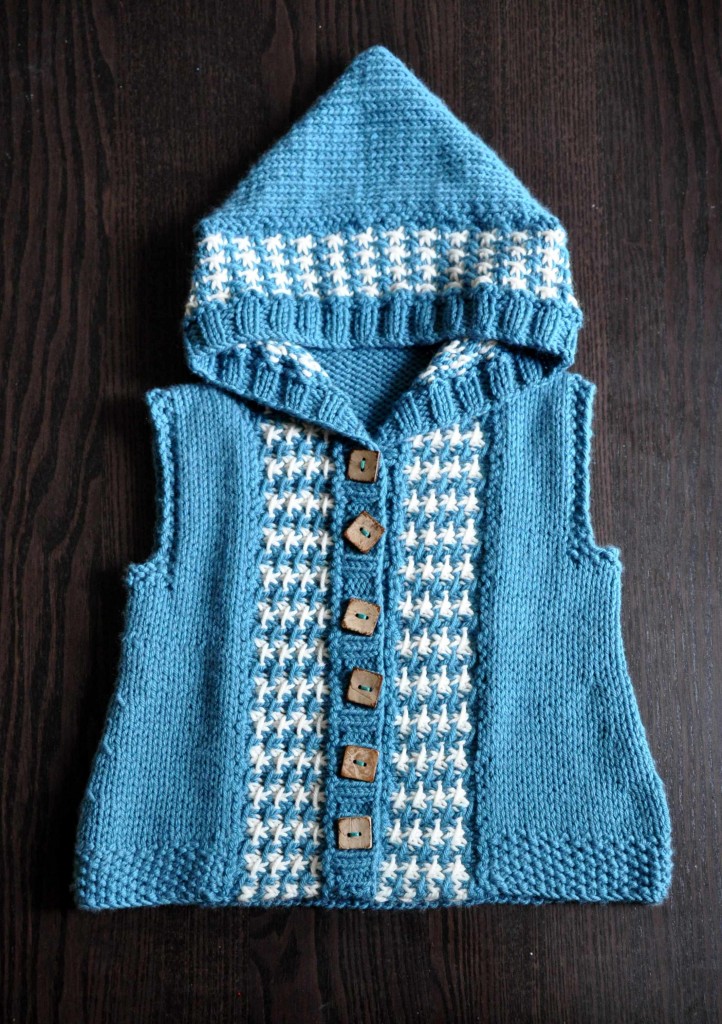
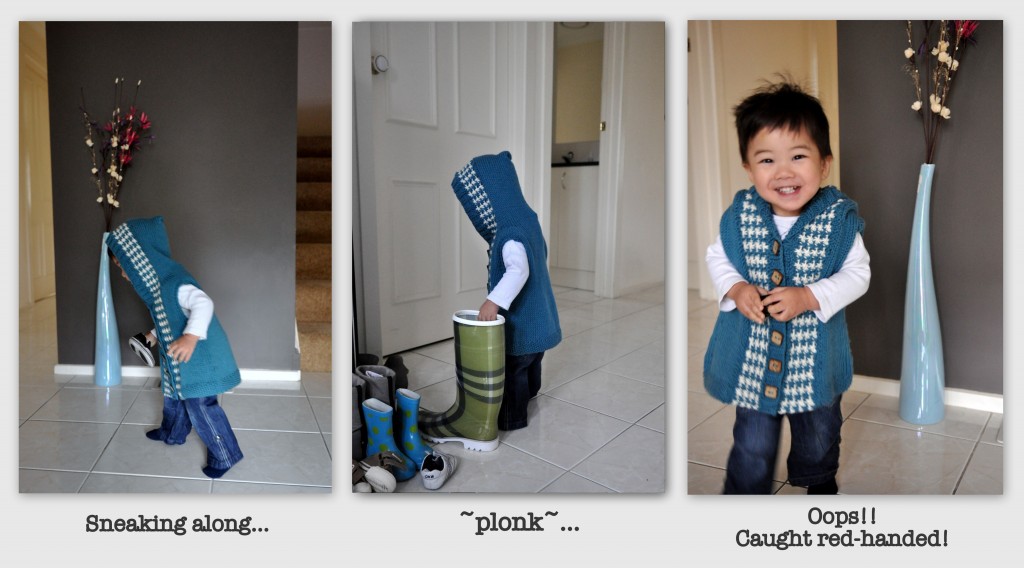
I call this the “Risk-Taker’s Hoodie“.

Specs:
Yarn: Debbie Bliss Cashmerino Aran (4 x Teal, 1 x Cream)
Needle: 5.0 and 5.5 (I was aiming for a bigger garment so I adjusted my gauge slightly)
Size: 18-24months (Using the instructions for 18months, knit with looser gauge)
Mods: Used Kitchener Stitch instead of the 3-needle Bind-off for the hood.

If I were to knit this again (tempting tempting) I would start with a ribbed bottom edge to go with with the button placket section.

Why “Risk-Taker’s Hoodie”? Well….
1. I am taking a huge risk knitting properly again;
2. I grafted with Kitchener Stitch when I had an ODD number of stitches (GASP!)
3. I don’t normally like to play around with gauge-changing…:p
4. This was made for my son, who has seemingly inherited my kind of risk-taking…his biggest risk being his habit of doing things I just told him not to…SIGH.

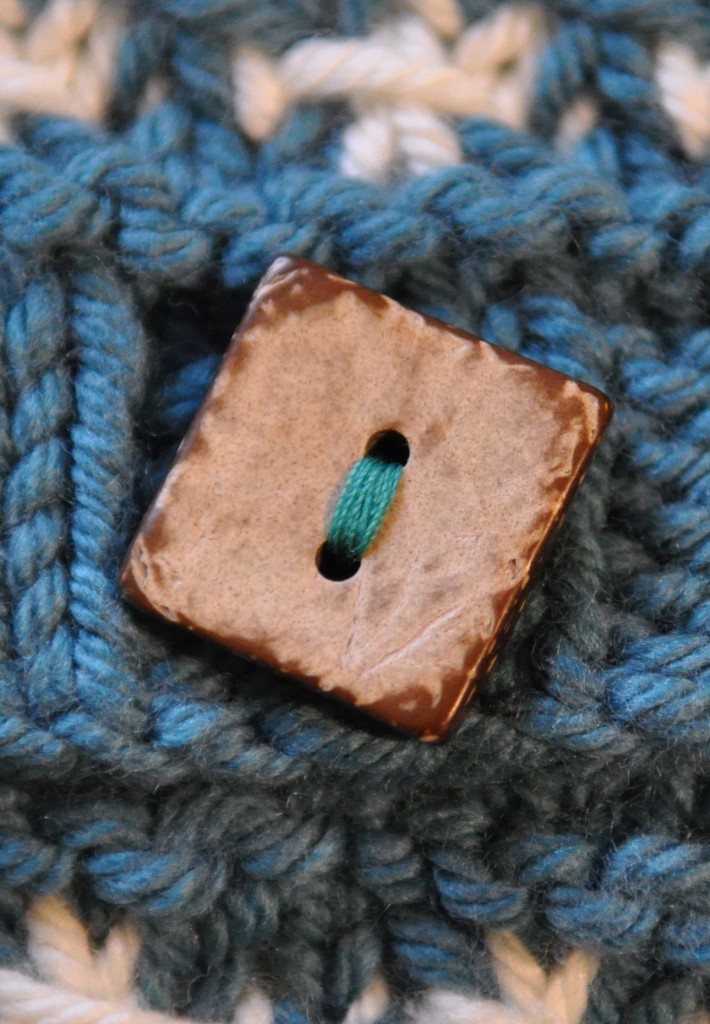
Another wonderful, fun, quick knit. Oh and for once, I am completely satisfied with the buttons I found! I chose square buttons because they somehow really work with  white stars on the hoodie, which are in some ways, squarish….if you get what I mean :p
I found that my wrist felt a bit stiff every time I put down my knitting. I massaged it very often and tried to keep it warm. Hopefully this is a good indication that with even more rest, the pain WILL go away eventually?

Posted in Knitting | Leave a comment

Yes, Jesus loves me…I think?

2009 – Switzerland.

A young couple cradling their 8-week-old baby girl stood in the Zurich airport seeing her new grandparents off. They were probably speaking of looking forward to their next visit, promising to email photos and make regular phone-calls, when the parents noticed something wrong. Something wasn’t right with their baby.

Not long after, the baby girl was pronounced dead.

A few days later, Hubby and I sat in the pews of the only English-speaking church in Luzern, excited about worshiping with fellow Christians halfway ‘round the globe from home. Yet excitement turned into shock when the chairman of the morning service prayed for this grieving couple, sitting in the pew in front of us.

The intercession was over, and we stood to sing a hymn. With teary eyes, I began to sing along:

“Jesus loves me this I know, for the bible tells me so, little ones to Him belong…”

At this point, the grieving mother dropped back down on her seat, sobbing loudly, her husband in his own pain, trying to console her.

My heart broke, my mind scarcely able to contain the knowledge of such tragedy and warring against witnessing their pain, but what I was about to see and hear next, was really beyond comprehension for me.

Hurting for her, I prayed silently, “O Lord…….” Yet, before I could even form a complete thought, the lady took a deep breath and stood right back up, and joined us, singing loudly through her tears:

“YES, JESUS LOVES ME! YES, JESUS LOVES ME! YES, JESUS LOVES ME! THE BIBLE TELLS ME SO!!!”

I myself could not continue singing. My whole being was captivated by what I saw. This woman will never hear her daughter say, “mama”, never know whether she would have looked like mommy or daddy or what her personality would have been. The promised photos, phone-calls, visits…life would never be the same.

For her to sing with such conviction, that Jesus loves her, while her baby’s body was still lying in a morgue all the way in Zurich, awaiting an autopsy, that she could sing with complete confidence in God’s Word, even as her heart was in a million pieces, was unbelievable, was beautiful, and amazed me.

I walked out of that church a changed person.

As Christians we claim to believe bible truths, truths about our God, but more often than not, we’d be hard-pressed to see the fruit of that belief in our lives.

Oh but we get by. Friends tell us how faithful we are when we go to church regularly and attend bible study, serve in ministry and say, “I’ll pray for you” to everyone. We “feel” so close to God when we sing along with that 12-piece worship band on Sundays. That should be enough worship/faithfulness for the week, right? Well no, it’s not.

I do not claim to have managed to do so myself, but what we should be striving towards is worshiping and trusting in God in all our actions, all our words, all our thoughts and every fiber of our beings, ALL the time. We are not called to outwardly “get by” so that we appear “Christian”, we are called to live lives in obedience to God, aiming only to please Him [Rom12:1].

Church, ministry and other outward actions, recited bible verses etc. are very often things that we rely on to reassure ourselves…or rather, convince ourselves that we are faithful to God, but what happens when God takes those props away?

I believe it is through our sincere, prayerful study of God’s Word that the Holy Spirit enables us to have faith in the Lord in all circumstances, because it is in the Spirit’s illumination (revealing) of the Word that we come to know the Lord. My teaching leader at BSF said: “It is essential to know something about the character of a person before you can trust them.” How true! We can only genuinely trust God if we know what it is that we trust about Him, right?

Perhaps you are reading this and thinking, “I could not possibly have faith like that couple in Switzerland! I might as well give up.”

The apostles said to the Lord, “Increase our faith!” and the Lord said, “If you had faith like a mustard seed, you would say to this mulberry tree, ‘Be uprooted and be planted in the sea’; and it would obey you. [Luke17:5-6 NASB]

Dear reader, I can bear witness to the fact that God can and will use your mustard-seed-sized faith when you genuinely turn to Him. From family tragedy, hubby’s brain surgery, spiritual oppression/abuse and chronic pain, to marriage and motherhood etc, I have seen God graciously take my itsy bitsy faith and gift me with enormous faith to survive. Yes, faith is a gift, for we cannot possibly have faith in God without God’s enabling. All glory is His.

…Most gladly, therefore, I will rather boast about my weaknesses, so that the power of Christ may dwell in me. [2Cor12:9b NASB]

I believe that is what I saw in the grieving mother. The power of Christ, dwelling in her, enabling her to soar in victory through her pain and suffering.

Yes, she will always grieve for her baby, but her genuine faith, though imperfect like our own, was accepted by God and increased, solidifying her confidence in Christ’s love for her, and I believe she has hung on, secure in Him through the storm.

2011 – Anywhere in the world.

What do you need to change about your approach to reading God’s Word?

Posted in Just Me Thinkin' | Leave a comment

Bloom for a little beauty in bloom

When I was told that I was having a boy, I was confused because initially we were told we were having a girl! So I decided I’d try to be on the safe side as much as possible, and make and buy everything unisex. Of course, that just meant I had license to buy and make lots of green things (yes yes yes it’s my favorite color)!

When I had another scan at almost 30weeks, they said again that it was a boy, so I thought well maybe I should believe them now haha. I went out and bought a set of trains to decorate the wall above his cot, and then of course, I looked for boy-patterns on Ravelry and Etsy etc. I found it really difficult to get cool boy-patterns, and to make things worse, all the girl-patterns were so so so so darling! Once again, I “met” designs that I couldn’t resist, so I made shoes (sewn), hat (crocheted) and dress (knitted, the Acacia a couple of posts ago) for my niece to satisfy that “Oh I must make that right now!!!!” thing.

When my sister told me that our friend (and genius cake designer) Natalia had given birth to a baby girl, I immediately searched for something I could make for baby Lani. When I saw her photos, I knew I had chosen the perfect thing.

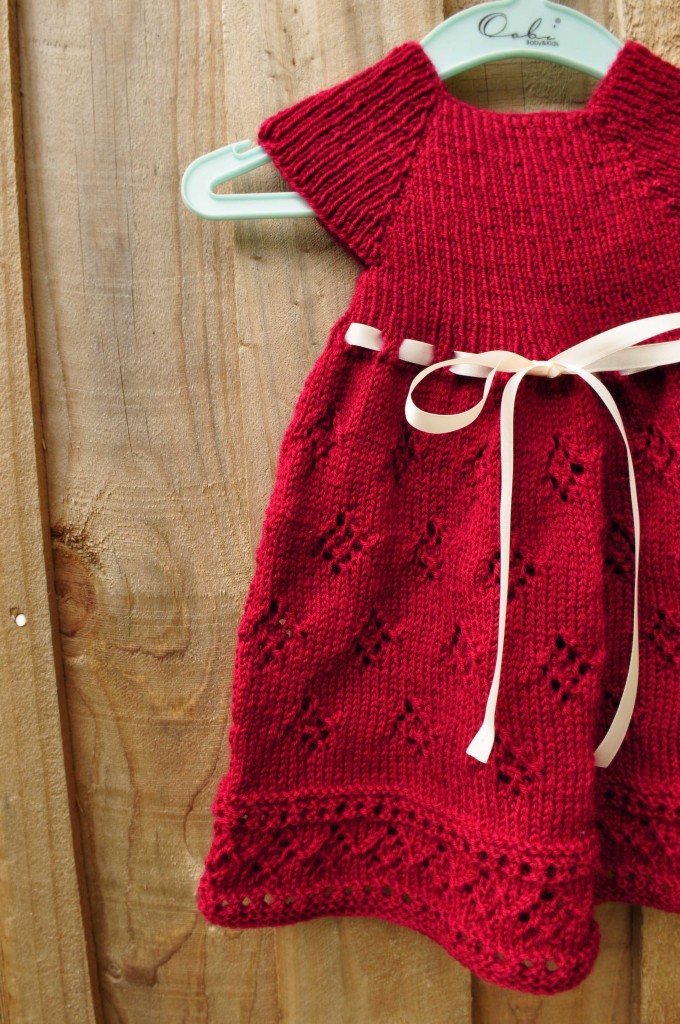
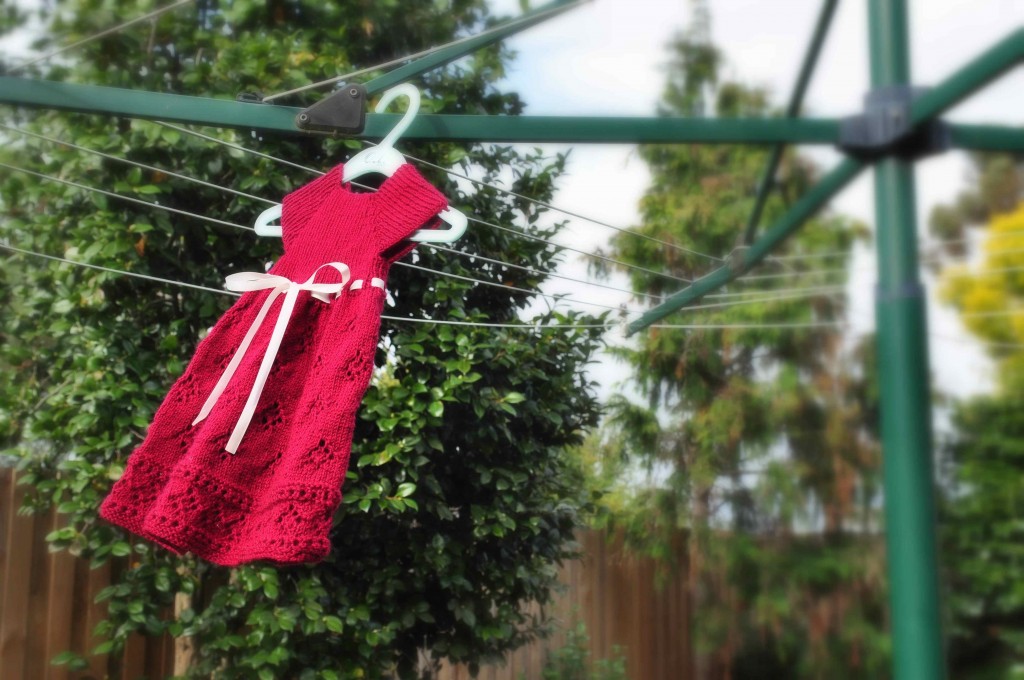
This is the last item for my tiKKi knitathon, as I have queued several other projects and am working on a design of my own at the moment. This dress is called “Bloom”, and over the course of its production, Lani was blossoming very quickly, more and more gorgeous every day, indeed she is like a flower blooming in spring.

It took me a while to make this as I moved in between, but here it is, Bloom, knit with Bendigo Woollen Mills Luxury 4ply on 3.25mm. Knit in the round and seamless with the bonus of the 200g ball of Luxury that meant only TWO ends to weave in! SCORE!

“Bloom” is designed so that as the child grows, it can become a cute top. It looks a bit red here but it’s a deeper shade, close to burgundy.

I may or may not post a pic of Lani up on this blog, but just believe me when I say that she looked sooooo sweet in it, and I am happy to report that Natalia’s reaction to it really made my day :)

Babies sure are blessings, not just to the family but to those around them. They add just that bit of extra color to our lives don’t they? :)

Posted in Being Mom, Knitting | 2 Comments

Irresistible

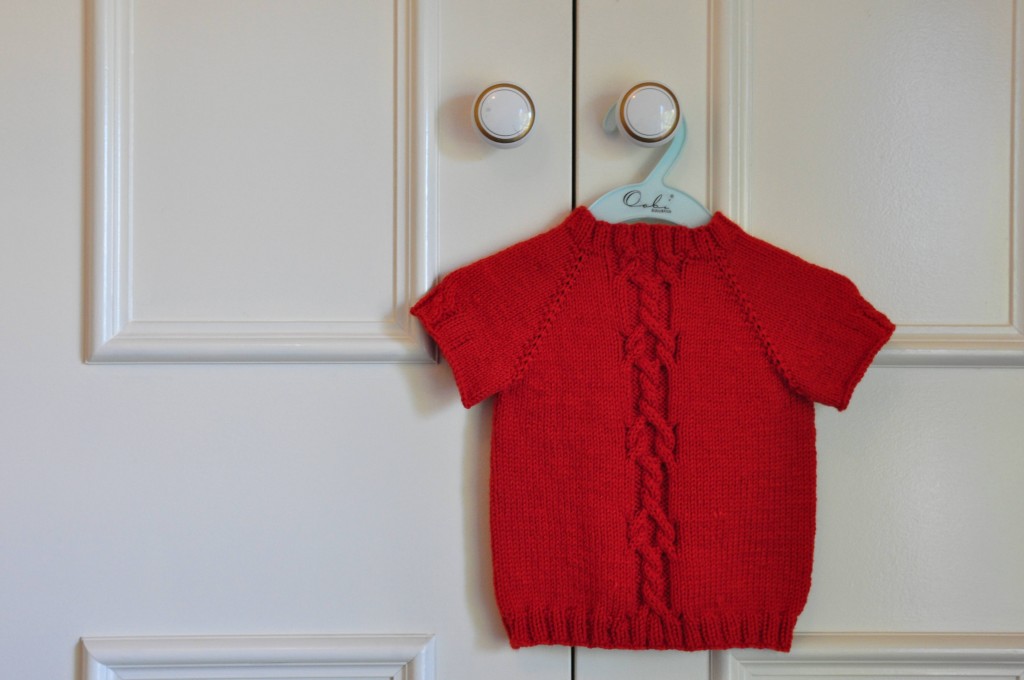
Every once in a while, you come across a design that you just HAVE to make right away, and I’m sure you’ll understand once you see this super duper cute “t-shirt”, “Fratello”, designed by tiKKI (I’m on a tiKKi-roll right now!). It is simply irresistible!


I just couldn’t wait for the 30cm circular needles to arrive via express post. Once I had swatched and managed to hit gauge (using 3.25mm needles instead of the 4mm suggested), I cast on and knit using the magic loop method, and before I knew it, it was 3am and I really didn’t want to put my knitting down for the night.

In the end, what stopped me from crazily knitting this gorgeous design in one sitting, was the other, even more irresistible “thing”…a certain little bub :)

“Fratello” is a great design for those of you who love knitting in-the-round (as with most of tiKKi’s designs). The cable pattern is extremely easy to follow. You would definitely need to be willing to knit using dpns or know how to use the magic loop (for the neckline and sleeves).

As for yarn, because this is like a t-shirt, and therefore possibly worn directly on the skin, you should be very careful with what yarn you choose. My personal opinion is that pure wool wouldn’t be suitable for under-1s. I decided that I’d most probably put something underneath the top, but just in case, I chose Debbie Bliss’ Cashmerino DK, which is a blend of Merino, Cashmere and Microfiber :) It’s lovely to the touch, and blocked really well.

I won’t apologise for the squealing you might experience when you see the following pics. It’s what happens when you put irresistible and mega-irresistible together ;)


Don’t you just want to jump into your screen and give him a little cuddle? :)

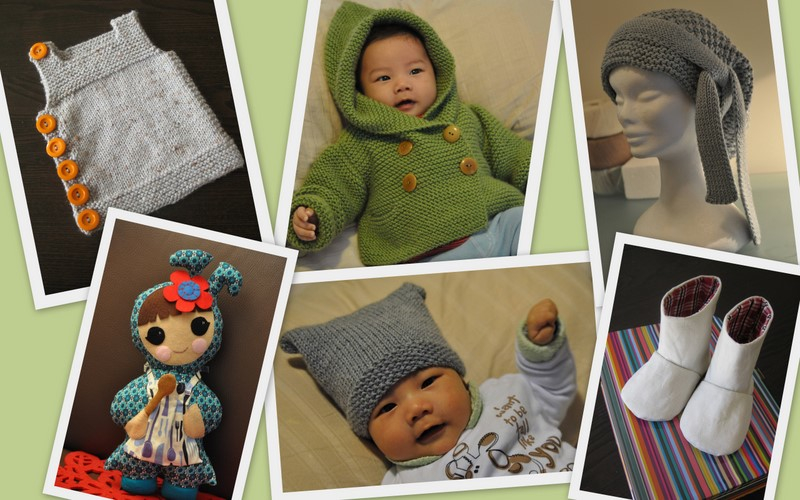
I thought I’d show you some other irresistible patterns I’ve come across last year:

Top L-R – Nikol Lohr’s Pebble Vest; Debbie Bliss Duffle Coat; Amber Daniels-Cook’s Peasant Hat
Bottom L-R: Jhoanna Monte‘s Baby Chibi Doll; Natural Star’s Square Hat; SewingWithMe‘s Baby Boots.

Oh and maybe just one more squeal-worthy pic to end this post :)

Posted in Knitting | 2 Comments

Backing up a bit

Oh dear friends, I do apologise for being away for so long without a word. Turns out moving houses with a bub is really THAT difficult. Eeks…so much to say to bring you up to speed.

So we were moving 1.5hrs-drive away…which meant EVERYTHING had to be up and removed on the same day because it would’ve been too difficult to go back and forth with Hubby starting work 2 days after the move (with no time off before the move either), and lugging our little bub around as well. By December, Bub had decided that he would take to commando crawling at super speed, so the entire time we were packing up the house, I was also chasing after him most by myself.

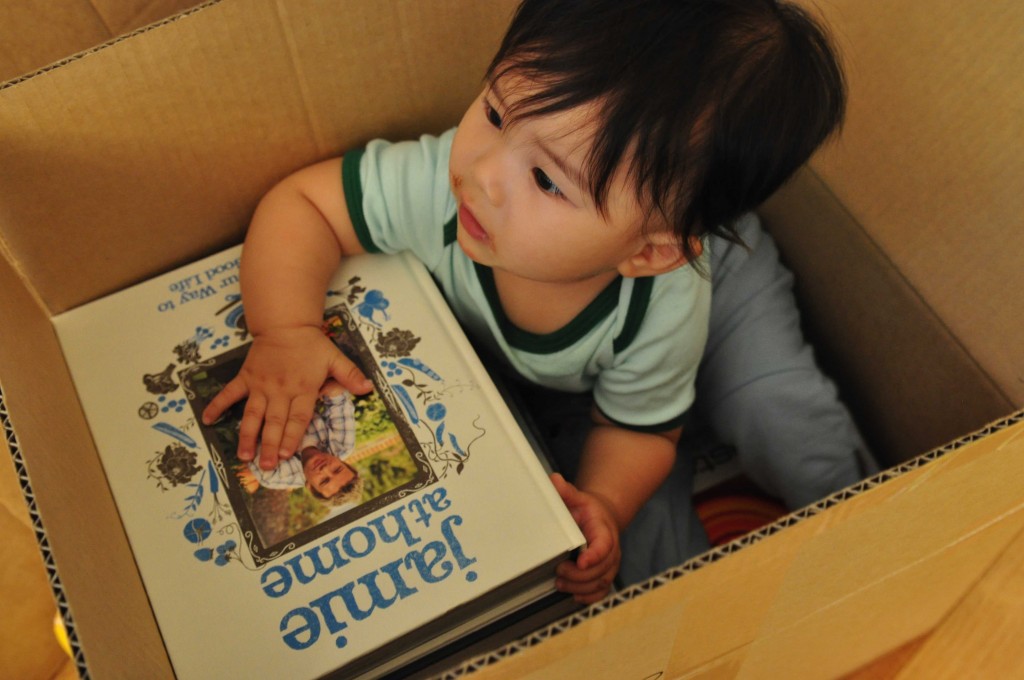
I did think of one way to steal some time to pack while entertaining said bub:
Sure kept him “contained”… ;)

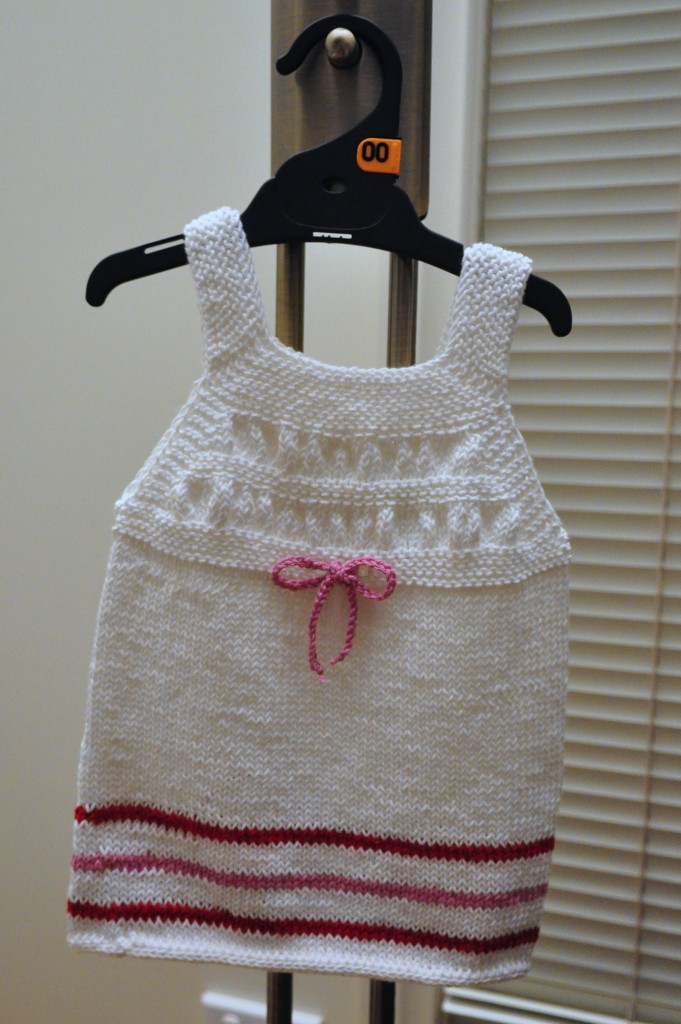
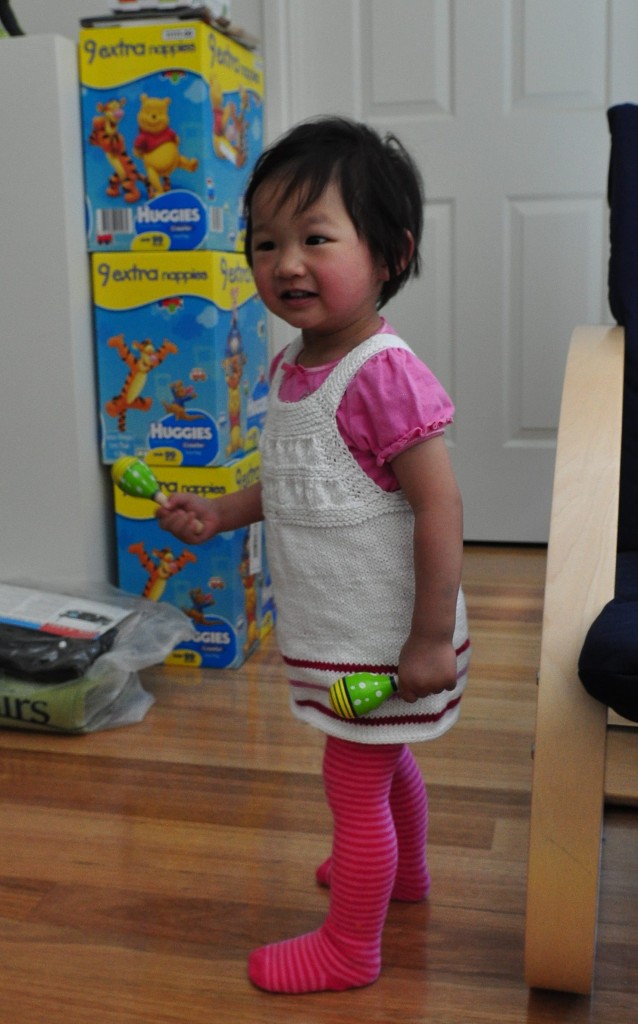
Of course though, I had to procrastinate a tad…a bit…….OK a lot, and my sister was telling me how my 1.5yr-old niece had learned to call me “yeeyee” (it’s what one’s mother’s younger sister is called in Cantonese) so I thought I’d knit her a Summery item to encourage more of this aunty-love (teehee) :) I used Australian designer, tiKKi‘s “Acacia vest pattern to make her a dress :D Please excuse the sloppy photography this time ’round!

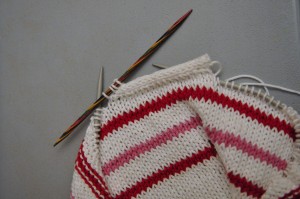
I used Panda’s Cotton Blend…(awesome!). The colour ribbon is sufficient for a vest, but for a dress, I thought it needed a little more, so I put in some stripes before finishing up with the applied I-Cord, using the “Traveling Jogless Stripes” explained here. TECHknitting is the most fantabulous site for tricks and tips by the way!

So here’s my gorgeous niece. She kept pulling the ribbon out and using it as a bracelet and toy instead…little munchkin :)

Will do more back-pedaling in my next post!

Posted in Knitting | 4 Comments

Winter Knitting in Summer

OK, so I finished knitting the Manly Boy Jacket ages ago. Why are there no photos? Well, I procrastinated on piecing everything together when I got frustrated with the sizing :p Instead of a size 1 or 2, I reckon this thing looks like it’s for a 3yr-old! Only up side to this is that I, very conveniently, have a 3.5yr-old darling nephew, so I might give it to him (if it fits) and make another one for bubs.

Another reason I’ve taken so long to finish it off is because I’m packing to move. We moved from Melbourne to Geelong (1.5hours drive) in January 2010 because hubby had to work at the hospital there for a year. We knew it was only for a year, so we were always only half unpacked…but when I received my little bundle (a.k.a a certain cute bub), along with him came all his gear and furniture, so we’re back to lots and lots of packing now, getting ready to move at the end of the month.

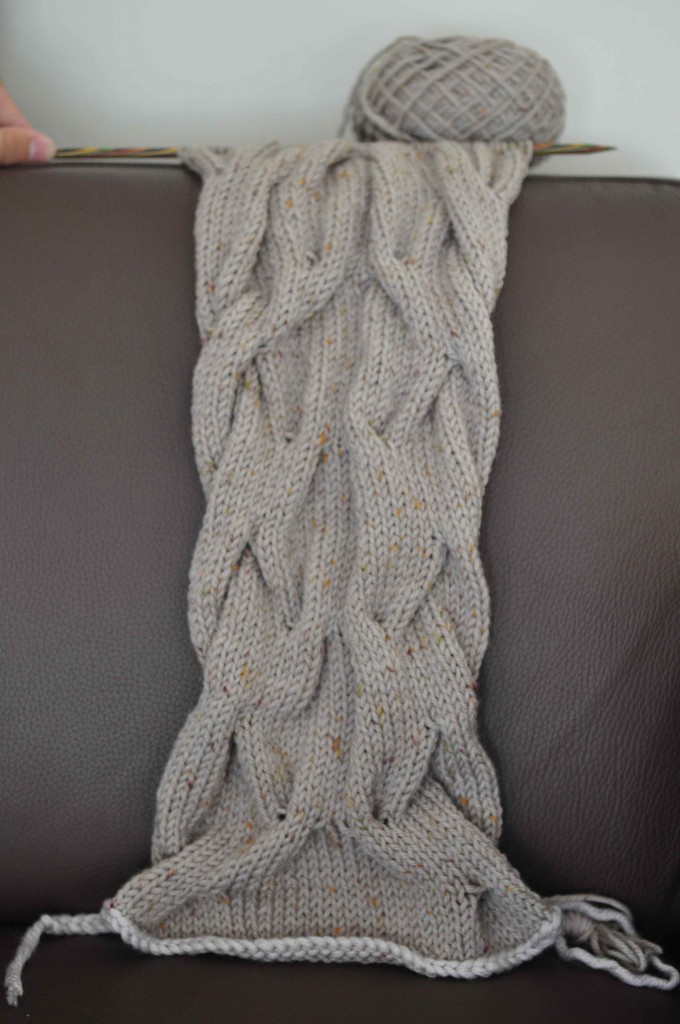
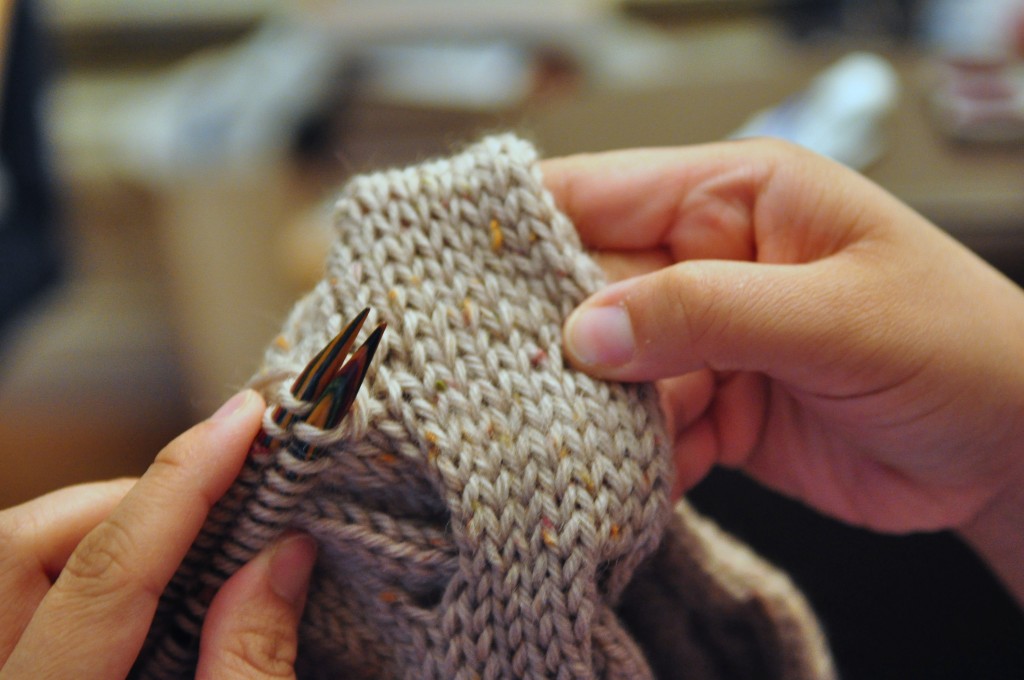
So, what better way to tackle the big move than ermm…knit? The pattern is called “Tuesday Cowl”. It is provisionally cast-on (I use the crochet method, tutorial here) and grafted (Kitchener Stitch) once you’ve finished knitting so the seam is invisible. By strategically placing cables, the cowl “scrunches” down quite nicely.

All knitted up, ready for grafting!

Kitchener Stitch – the seamless seam

Even though I measured the length of the cowl before grafting, I wasn’t sure how tight-fitting it would be around my neck. If I made this again, I’d add an extra repeat of the cables.

Don’t ask me why I made this during Summer in Australia :p

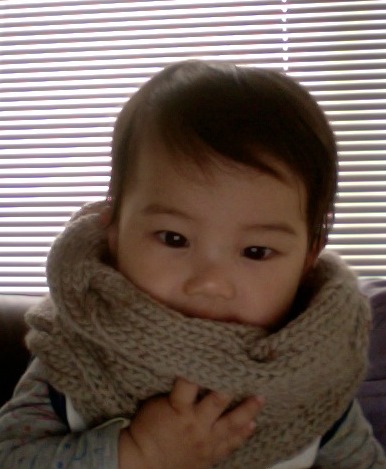
Bub is such a good sport, here he is, modeling for me :)
He looks better in it than I do!

This is so warm and comfy to wear! Bendigo Woollen Mills Rustic yarn turned out to be quite nice to knit with.

Posted in Knitting | Tagged , | Leave a comment

Blocking, not for Blockheads

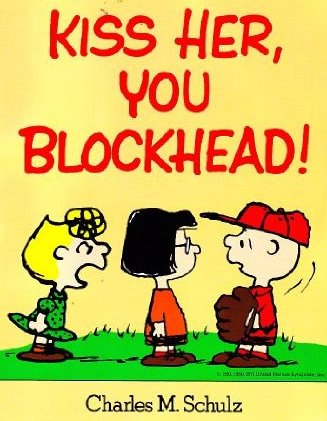
Whenever I think of “Blocking”, I think of my all-time favorite comic strip “Peanuts” by Charles Schultz. Lucy, Peppermint Patty and probably Sally always used to say, “You blockhead!!” at the boys (Charlie Brown, Linus etc.). Yes I’m known for making silly associations :)

Cover of one Peanuts comic book from my huge collection

Aaaaaanyways. I never used to block anything because I only knew how to make ribbed scarves and Jean Greenhowe toys, but as I slowly attempted garments, cables, laces etc. I finally understood this important step in knitting, crochet, tatting etc.

I am still relatively new to this of course, but I thought it might help other beginners to see how fantastic blocking is. I thought mom’s Sea Foam scarf would be the perfect example.

According to Montse Stanley, author of Knitter’s Handbook (THE book to get for knitters), “To block is to give a permanent set to knitting”. It conditions the yarn so that it will keep the shape of the stitching, that is, to keep the piece looking like you intended it to. Stanley says that it “improves the performance” of your knitted pieces.

By blocking, you can fix minor flaws (uneven knitting etc.). Also, say you’ve knitted two sleeves but one is shorter, to some extent, blocking will help to fix this problem. and you know that stockinette stitched swatch that curls up its got something to hide from you? Blocking will make it flat so you can see the clean lines of the finished piece. Blocking makes your lacework look professional too :) It’s tempting to skip blocking, especially with scarves, but don’t! Trust me, as you shape the garment on the towel, it’s really exciting!

All you do really, is to dampen and shape the piece. That’s what blocking is.

You will need:

  • old towels (that are big enough for your piece, you might need more than one);
  • quilting pins (I use LOTS teehee);
  • measuring tape or ruler;
  • spray bottle filled with plain water; &
  • (if desired) foam pieces that are big enough for your piece (I bought medium density foam from Clark Rubber in Australia).

I like to use the thick pieces of foam because I like to pin the pieces by poking into the foam, rather than at an angle.

Step 1: Take your knitted piece, stretch it, pull it (both gently) and decide how much you want to shape it in order to enhance the pattern, or how long your pieces needs to be.

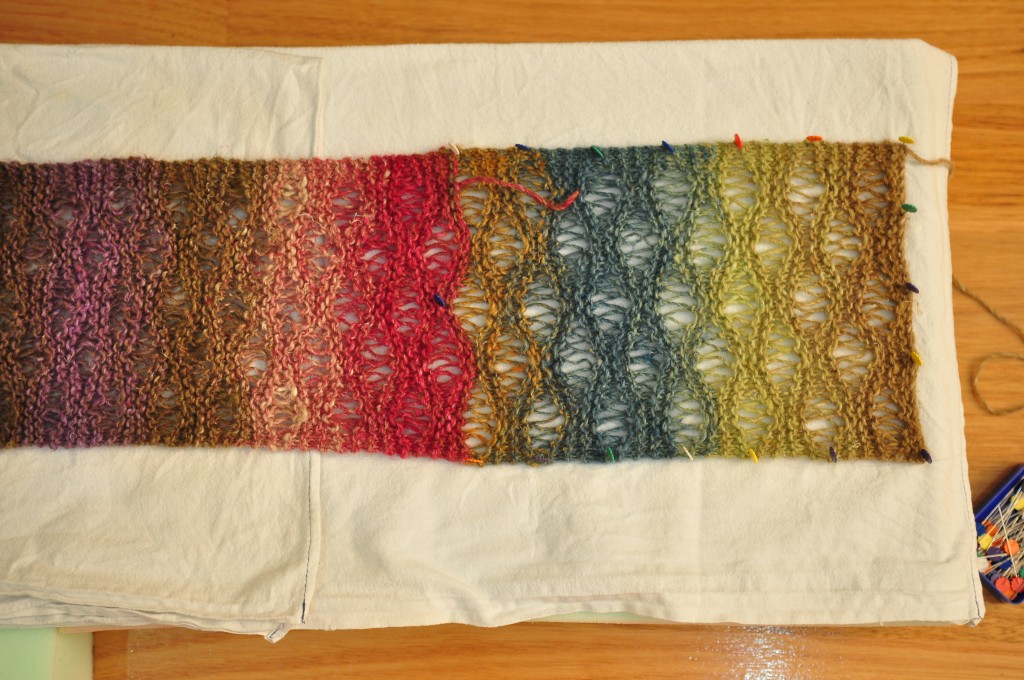
Example: I decided on the width of the Sea Foam scarf (7.5″).

SHAPING
Step 2: Lay your towel on your work surface/foam and then your piece on top. Working from one end to the other, pin the piece onto the towel, and check that you’re pinning the piece to the exact measurements.

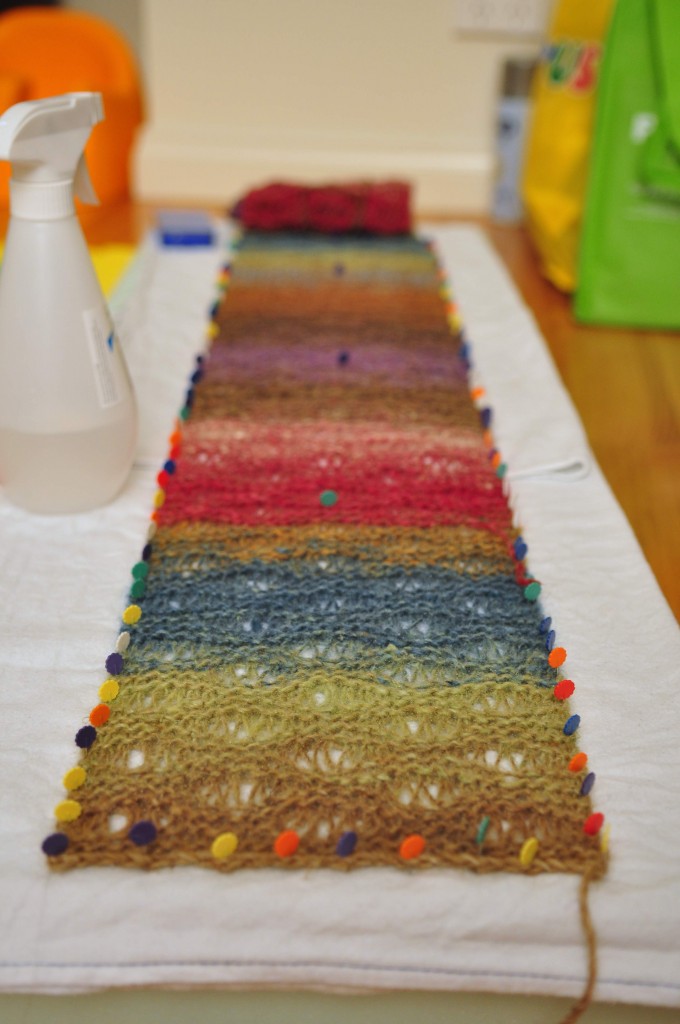
Example: I pinned the scarf edge so that it was straight, and then working along the length of the scarf, I gently pulled it lengthwise (in short sections) to what I considered would bring out the lacework most beautifully, pinning it down along the sides, always checking that the width of the piece was stretched to 7.5″. Below, you can my shaping in progress:

It’s taking shape!!

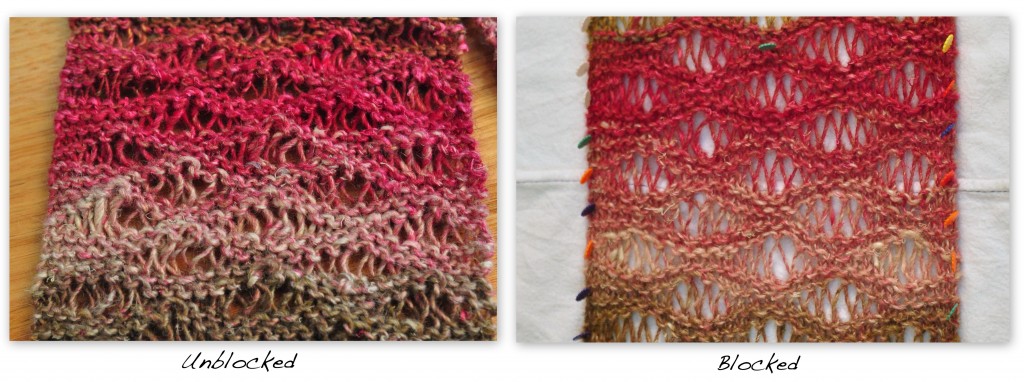
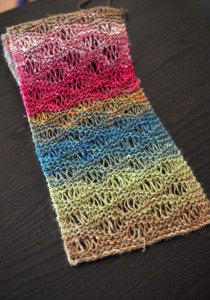
Compare the before and after photos below and take note of how the yo (yarn over) pattern is “revealed” by stretching the piece out:

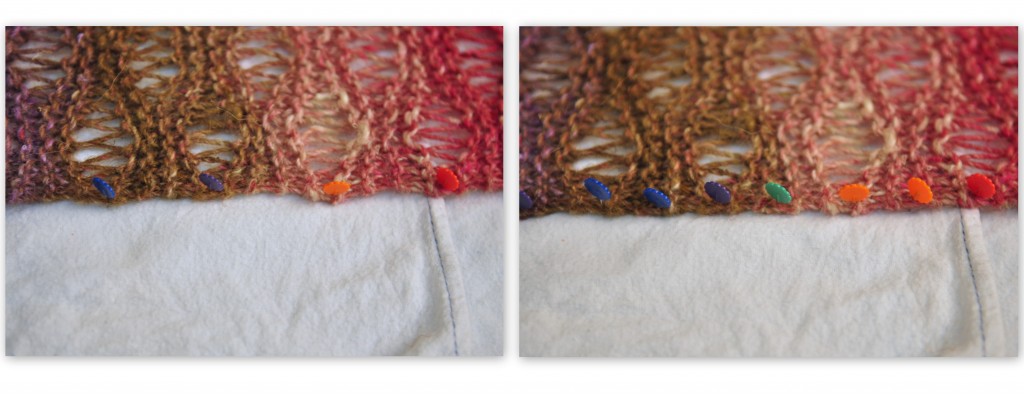
No use taking the time to block if you’re not going to straighten straight-lines! So if that means you’ll be using gazillions of pins, so be it!

Use pins anywhere in the piece! I placed a pin in the center of the piece every now and then to help even out the lengthwise stretch of the pattern.

DAMPEN
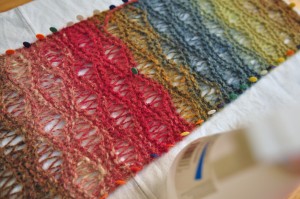
Step 3: Get your spray bottle filled with water, and spray the piece in sections to make sure you’ve covered it all. The point isn’t to make the piece dripping wet, but to have the entire piece damp.

Not that you can see the water droplets in this photo :p

Then leave piece to dry on the towel overnight, away from direct sunlight.

Sweet dreams, my dear blockhead blocked scarf

Once it is completely dry, you can take out the pins!

My foam block wasn’t long enough for the scarf so I blocked over two nights. Good thing is, that meant I could take pictures to show you the difference pre and post-blocking :)

Most people will weave in the ends before blocking, but I like to do so after, so that the ends don’t come out from all the shaping I do while blocking.

Voila!
Dimensions unblocked: 6.25″ x 46″
Blocked: 7.5″ x  57.5″

In the end, my mom helped me with weaving the ends in because she’s better at it!

I wanted to make sure mom took it home with her today so I didn’t have time to take more photos, sorry! However, I made sure I took one of mom posing with her new pressie :)

I think it suits her, don’t you think?

I hope this post helps anyone new to blocking :)

Posted in Knitting, Tips & Tricks | 2 Comments